We have put together this tutorial to aid you in the preparation towards creating a real estate, rental or vacation rental property listing on the MTP web site. The visual presentation of our homes, on our web site and marketing initiatives, is a major factor in the success of everyone involved. Use the menu below to jump to the subject of interest.
- Raison d’Etre or What the heck is this all about?
- Tips for Taking Digital Photos
- The MTP Property Library
- Folder Hierarchy Guidelines
- Final Preparations
- Renaming your Image Files
- Resizing your Image Files
Got your photos ready to go? Then, its time to Add a New Property Listing
Raison d’etre
Due to the ever increasing pace and complexity of our business, it is important that we are organized – that we pay attention to care and the processing of our property photos and the structure of their file names. This enables the website to run optimally and as quickly as possible for our website viewers. Towards this goal, we have a few simple rules.
- photos should be renamed to indicate the property address and area of the property.
- re-size photos to fit their intended usage; i.e. our website, Facebook or Ciirus.
- MTP web site – all property photos should be resized to 1024 pixels prior to uploading. Larger sizing of single photos may be required for page headers and Facebook default images.
- CiiRUS Portal – all vacation property photos should be resized to 1600 pixels prior to uploading
With these guidelines established, we have organized this tutorial into the best practises for management of our property photos.
Tips for Taking Digital Photos
Here are some pointers to make your digital photos pop on your listing. Please remember that MTP does have a camera in the office, take this with you if required.
- use a better quality camera with a wide angle lens, cell phone photos just don’t cut it, yet.
- make sure there is adequate lighting, that the light source is behind the camera. Turn lights on in the room, open blinds during the day, use a tri-pod, if you have HDR mode on your camera, use it and check your exposure settings.
- stage the rooms – remove unsightly mess, remove creases from bedspreads, dangling wires, adjust furniture, add props to the scene (flowers, plants, wine glasses, etc.)
- choose angles and sight lines that show the most information, get back into the corners, use the bathroom mirrors to show the other side of the room, etc.
- always take photos in the highest resolution that the camera is capable of.
In our “perfect” world, the list below are the photos that we should have for each and every property. If a property is exceptionally beautiful then lets take more. Or if the view is the main attraction, lets get more of the main attraction.
- 1-2 exteriors
- 1-2 hot tub (lid open and jets on, bubbly and steamy)
- 1-2 views (more if it’s noteworthy)
- 1-2 surroundings (help orientate the guest)
- 1+ of each bedroom
- 2 of each kitchen
- 2 of living room including fireplace
- 1 of every bathroom (unless its just 2pc half bath), toilet seats down
- 1-2 of the entire main living area
- 1 of the entryway
- 1 of the parking area or garage inside or out
- 1 amenity shots: maybe there’s a cappuccino maker? Or cozy nook to read a book? A (clean) gas stove? Jacuzzi tub? Ski tracks going right to the home? Nice piece of original artwork?
The MTP Property Library
We have implemented a new central directory file structure to organize our real estate, long term and vacation rental property listing content. All new property content (photos, text, information) is stored in the MTP Property Library in a unique folder for that property. This allows us, in the future, to easily access and manage the content for any of our properties. For example, in the image below, you see the structure of our vacation rental property listings.
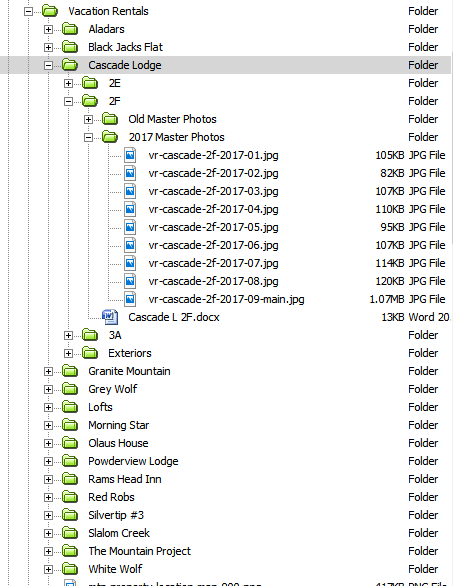
Given that the above is for our Vacation Property listings, our directory naming hierarchy is as follows:
Vacation Rentals / Complex Name / Property Name or Unit Number / Property Content Files
The directory naming hierarchy for Real Estate Listings would be similar:
Real Estate / Property Address / Property Content Files
Folder Hierarchy Guidelines
Once you’ve taken your property photos, it’s time to move them from your camera to your Property Content folder on your computer. If this is a new property, create a new sub-folder within your Real Estate or Vacation Rental folder and naming it by the property address or vacation rental name. Within that folder create a sub-folder for your photos and name it, for example, 2018-01-photos. If the property already exists and these are new photos, always create a new directory using the syntax year-month-source.
New photo sets are always kept separately in their own directory in their highest resolution. This, for the purposes of this tutorial, is the Working Directory.
From time to time, we encourage you to archive your Property Content onto our MTP Property Content Library as a backup for safekeeping and future reference.
Final Preparations
Go to the Working Directory that should now contain the property photos that you are working with.
Carefully review all your photos in full screen mode. Delete any photos that are blurry, have bad exposure, bad angle, etc. Be brutal.
When you are done and only your best photos remain, you are ready for the next step.
Renaming your Image Files
The Advanced Renamer is a Windows application that allows fast and easy bulk renaming of files in a given directory. To start, you will need to download and install the application. Go to:
http://digitalsynergy.ca/clientcare/apps/advanced-renamer-setup.exe
This will download the latest version of the software; once it is downloaded install and launch the program on your system.
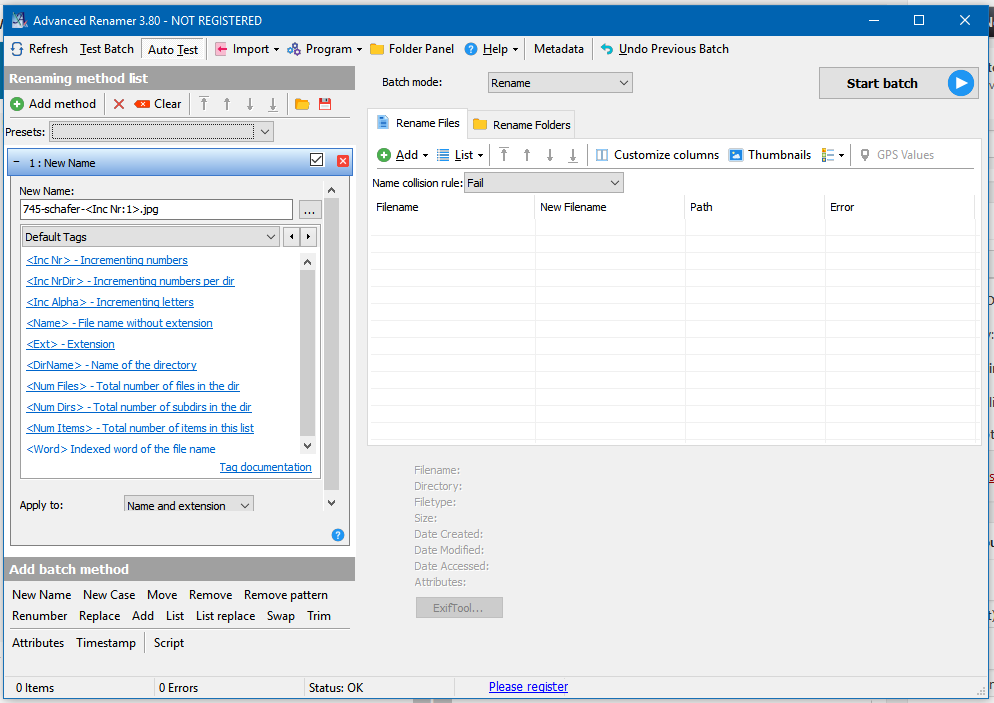
You’ll need to configure what batch method you’ll be using. Go to “Add Method” and select “New Name”.
In the “New Name” field, enter the property address, such as “745-schafer-”
Then, from the “Default Tags” section, select “ <Inc Nr>- Incrementing numbers” which will auto-insert this tag into the “New Name” Field.
Make sure that the “Apply To” selector below is set to “Name and extension”.
The finished Batch Method syntax configuration should look like this:
745-schafer-<Inc Nr:1>.jpg – see image below
Note the usage of hyphens and lowercase characters in your new file name structure!
Once you have configured your file rename batch syntax, you’ll only have to change the property address for future file rename batches.
The next step is to tell the software what file names that you want to change.
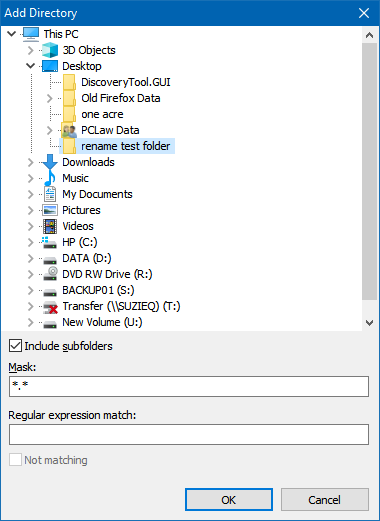
Under “Rename Files” click on “Add” and select “Directories”

This will show you your directory and file hierarchy on your computer, navigate to the location of your files that you wish to rename.
Select the directory and click “OK”.
This will show you the list of the current file names that you want to rename and a list of their corresponding renamed files.
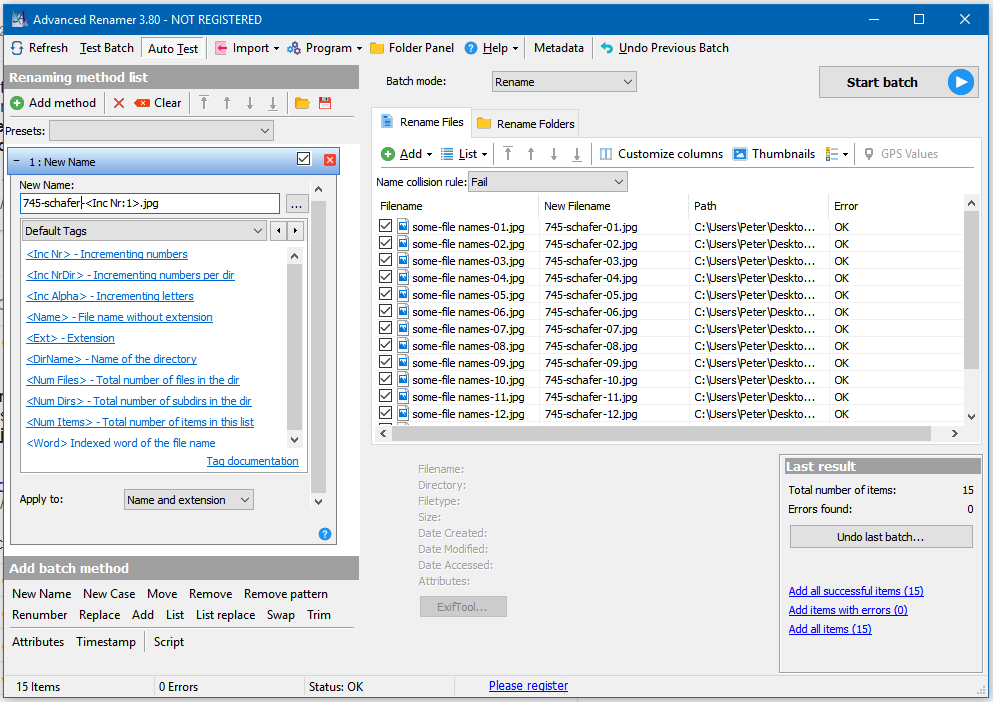
Check to make sure that the new file names are correct. If so, click on “Start Batch” and confirm.
Go to your working directory and your files all have new names!
Resizing Your Image Files
The PicResizer application is a small Windows utility to expedite the bulk resizing of images for usage on a web page. This saves on server disk space, bandwidth usage and your time. You can download the program file from:
http://digitalsynergy.ca/clientcare/apps/PicResizer.exe
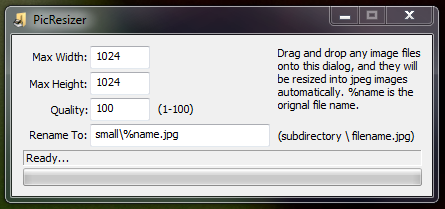
To use, double click on the file PicResizer.exe – the application will open and look like this.
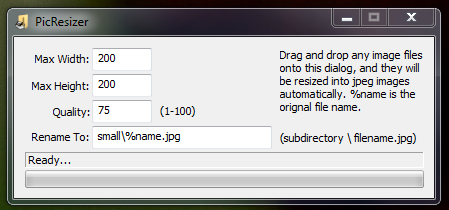
To begin, you will need to change the “Max Width”, “Max Height” and “Quality” to match your web site’s requirements. For the MTP real estate property listings, set the values to Max Width to 1600, Max Height to 1600 and Quality to 100. The “Rename To” field doesn’t need to be changed unless otherwise required.
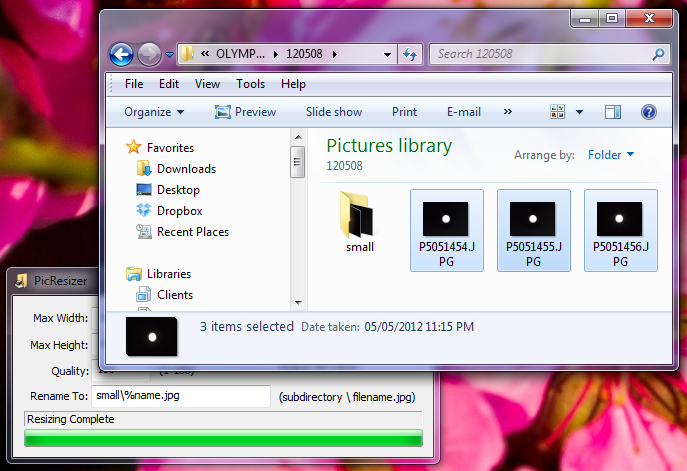
Once you have the utility configured, leave the PicResizer window open on your desktop, open your working directory of original photos that you wish to convert, select the images that you would like resized as in the next image.
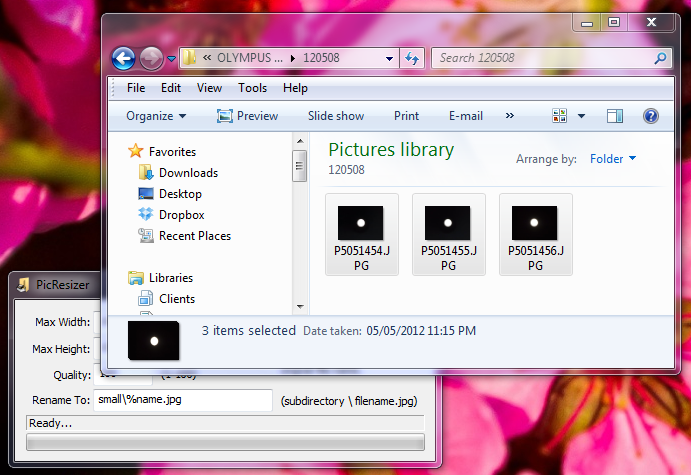
Once the desired files are selected, drag and drop the selected files directly onto the PicResizer application window. The utility automatically resizes the chosen images and places them in the created sub-directory called “small”. That’s it, finished!